I've posted a few photographs of how I put the puppet together and some of the techniques in case any one else wanted to have a go at making it.
Here's a list of tools and materials used in the project. There are probably a few more you might need but as a starting point here are the essentials.
Step 1.
First of, choose the size you want to make your puppet. Starting with the head is the best way to do this making sure the puppet will fit around your hand. I've used the template of a large cap as a starting point. Cut a template out of board, I do this so it is easy to draw around when marking out the foam for cutting, ensuring each piece is the same size, You will also have a template for future projects. Once you have five equal sized foam pieces, glue them together using a hot glue gun. This can be a bit tricky because the foam will want to absorb the glue, so take care not to burn your fingers when holding the pieces together. Pegs can be a handy tool to keep them together to avoid this.
Step 2.
Draw around the circumference of the base of the head shape and halve it to get the template for the mouth. Cut this out in foam board. Keep a spare copy for reference as you will need this to make the inside of the mouth later. Attach a piece of material or sponge at two ends, to the top of the mouth shape leaving space for your hand to pass under. Make sure to also leave a gap around the edge so you can attach the board to the head made in the previous step.
Step 3.
Attach the board to the base of the sponge. Repeat the process above to make the bottom half of the mouth, I've made the bottom piece larger slightly larger as I'm making a creature and adding an over bite. Tape both bits together securely making sure it can flap and close freely.
Step 4.
Cut two segments of foam that will follow the edge of the mouth shape. Attach using the curved edge to temper the foam in.
Step 5.
Measure the circumference of the inside of the head shape. I do this using a piece of string, laying it around the inside and then measuring it's length. Cut a piece of fleece that is roughly the measurement you have just taken by length of your forearm. Essentially what you are doing is making a tube that will attach to the base of the head, which your hand and arm will go through. Sew it together along the long edges leaving the short edges open. Turn it inside out when finished to hide the seem.
Step 6.
Use the mouth templates kept earlier to create the inside of the mouth, Draw around them on to felt,(I've chosen black but red also works depending on your colour scheme) and cut out a single piece, as shown above. Make a tongue using pink felt and add detailing using a felt tip.
Step 7.
Now it's time to start attaching the elements together. Glue the felt tube edges securely to the inside of the head and stick the mouth disk inside the mouth by folding it in half. This is also the point at which to skin the head, using fabric glue and the same felt used for the tube. As I'm covering the puppet in faux fur I've only covered the areas I know will be visible in fur. If your design is different however you are probably going to want to cover the whole head. You can stop at this point if you want to create a ghost puppet! Whilst waiting for it to dry, cut a piece of foam, again around the length of your forearm and around double the width of the head, This will be the body for your puppet. Temper and glue the top edge into a lip so there is a nice smooth edge around the top of the foam. Roll the foam and glue together to form the tube. When dry also cover this in felt.
Step 8.
If creating a monster puppet, attach the fake fur using fabric glue. This can be one of the most challenging bits of the build as cutting the material to the right shape and getting it to lay flush is difficult to get right. I find laying the material across the puppet and using pins to keep the material in place is the easiest way to figure out the best position before cutting. It will most probably take a few attempts but better than cutting the material and it being wrong. I've also added a lip, made again by creating a simple tube from felt material and stuffing. Now you can attach the head to the body by glueing the head felt tube to the inside of the foam body. Make sure to leave a couple of inches of material to form a neck between the head and body so the head can still move around.
Step 9.
 |  |
Now create a template for the arms, the length of the arms should vary, depending on the size of the puppet. Mine ended up being around 50cm as I wanted the puppet to be very animated. Cut around the template creating two sets of material which correspond with each other to create one arm and repeat the process. (EXTRA) If you want your puppet to be able to hold things in different positions, you're going to have to build a simple armature. This isn't as daunting as it sounds, an armature is just a fancy way of saying an adjustable supporting frame work. If you want to keep it nice and simple and don't think you need one skip ahead to the next step. Use the arm template as reference and cut a small pad of foam board out as a palm. Punch some holes to mark where the fingers match up. To make the fingers, feed in a piece of wire at two ends into a drill and tighten up the head. Hold onto end and slowly run the drill it should twist the wire evenly, reinforcing the wire and making it less prone to snapping. Repeat this until you have 6 longer pieces for the fingers and two shorter for the thumbs. glue them to the pad where you marked previously. Now feed some tubes of sponge over the wire. Using nail scissors is the best tool to trim any excess sponge, Take note if making an armature leave a gap (marked out in orange) when sewing the arms together, so you will be able to fit the armature in. When in place sew up using a ladder stitch to hide the seam as much as possible.
Step 10.
Sew together the material to make the arms and turn it inside out to hide the seem. Fill it with stuffing and sew up the ends. Paint the rods black and glue a piece of felt around the top leaving a seam to attach to the base of the hand. Lastly it's time to give your puppet some character and add the facial features. Iv'e decided to add some teeth using felt and sponge.
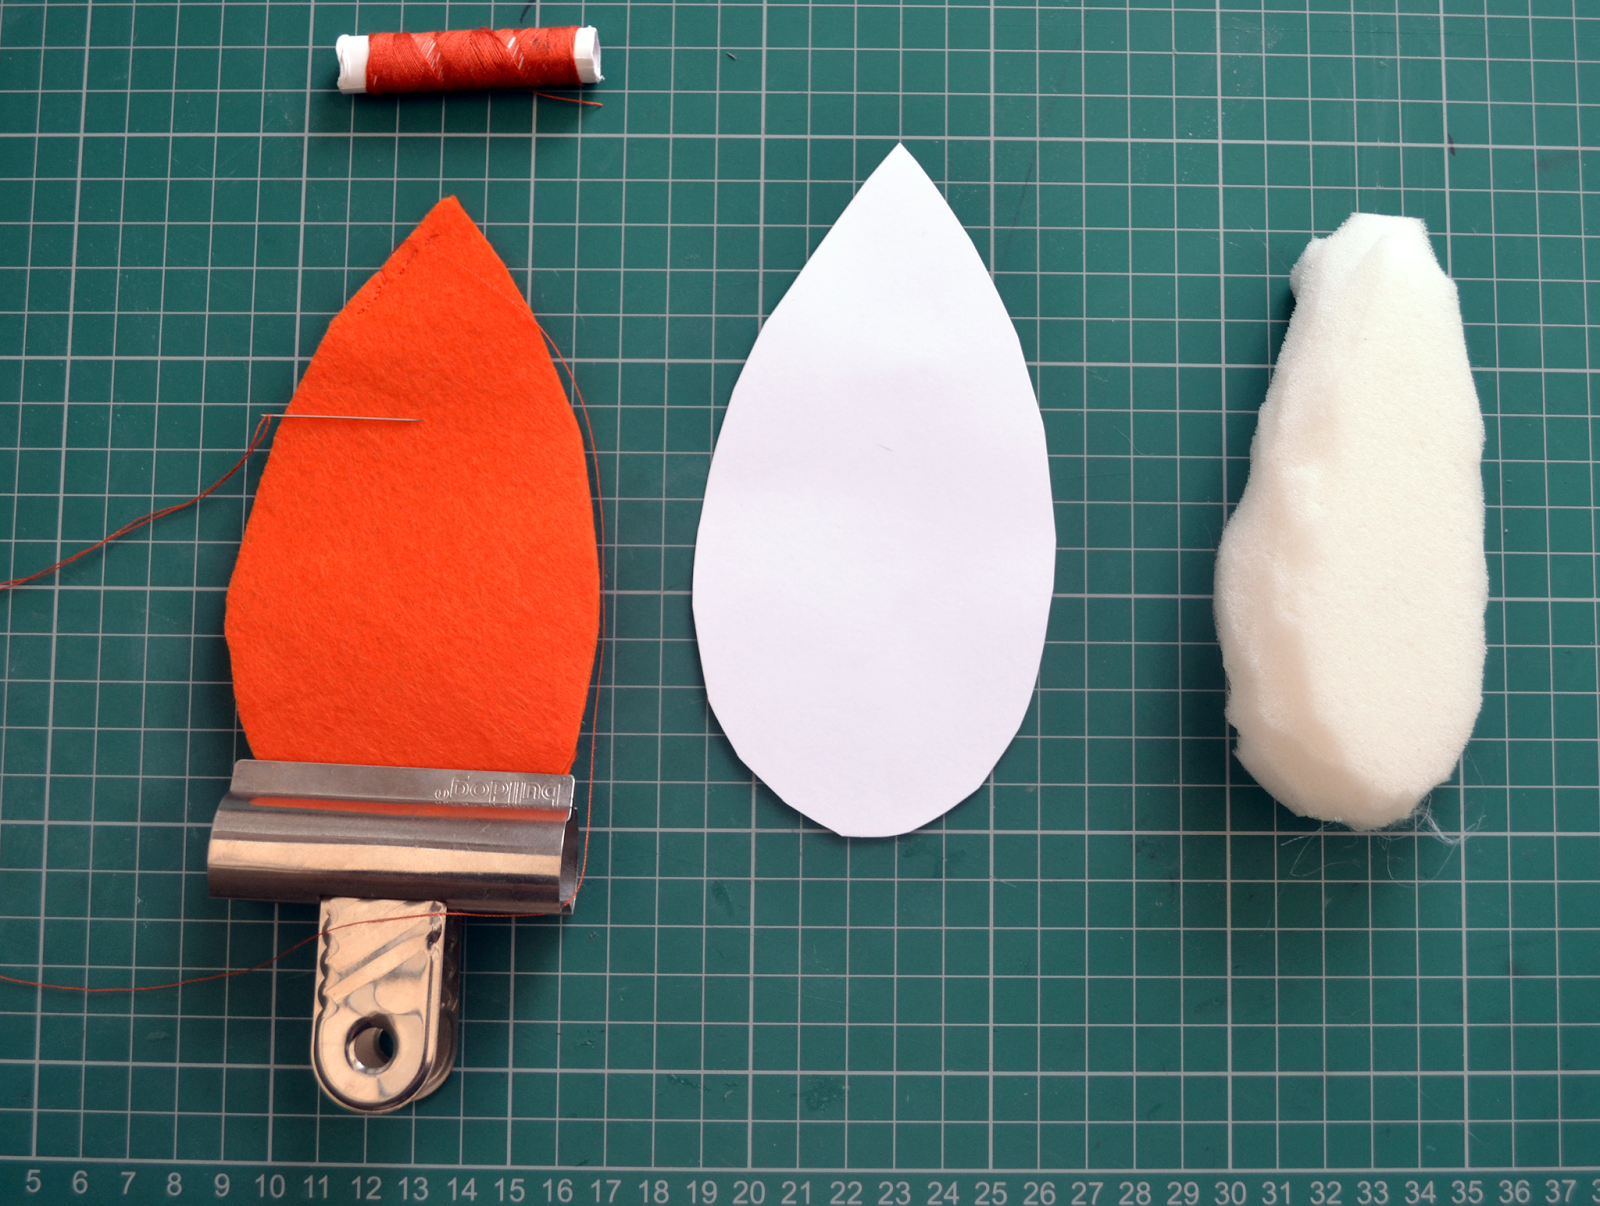
Step 11.
Normally the nose is in a contrasting colour to the felt used for the body, but as I've used white I wanted something that would really stand out opting for a rich orange. Create two tear drop shapes and sew together leaving a space at the top to put in the stuffing, For the eyes take two ping pong balls and slice a section (around a quarter) off the back with a sharp knife, taking care when cutting. Create an eye lid by cutting a half circle piece of felt and glueing around the ball. I also like to add a small black strip for detailing. Wait until everything is stuck on to the head before adding pupils as the positioning of the pupils might change when on the puppet, waiting until everything is in placed will inform you where best to place it.
Finished!
Voila, one hairy yeti puppet. I hope this guide is a useful tool for any one else who wants to create something similar. Would love to see other peoples versions if they decide to make something similar.


